History Gal: Tips and Tricks
Showing posts with label Tips and Tricks. Show all posts

Before you decorate that teacher planner...

by History Gal

Have you seen all the amazing teacher planners out there? They are filled with beautiful writing, inspirational sayings, colorful stickers, and just looking at them makes you excited to teach. BUT, before you go overboard and spend hours decorating yours, you need to remember their purpose - planning. Your year will go a lot smoother if you spend some time looking at the scope and pacing of what you need to teach. Not sure how to even begin? Read on and I'll explain how I organized my planner.
0

Growing a Classroom Library? Add these books!

By History Gal

Lately, I've been daydreaming about creating a social studies classroom library. When I see the amazing collections amassed by my friends who teach ELA, I think back to the collection of thirty year old encyclopedias, old textbooks, and atlases that made up my classroom library when I was in the classroom. They definitely served a purpose, but students weren't exactly excited to use them.

So...
What if teachers added books to their libraries that hooked students and made them want to learn more? What if the books made a foreign culture or time more relevant? What if the books were just fun to read? What if the classroom library became a spot that students liked to go to and were excited about?

While I was creating a wish list of books for my dream library, I realized I didn't have many recent books on my list. So, I asked my good friend and ELA teacher, Rachel of Writing by Rachel, to make me a list of recent books that should be added to a middle school social studies classroom collection. Here are her amazing suggestions.

0

10 Tips for the First Year Teacher

Stepping into your classroom for the very first time is one of those moments you never forget. Before my first year began, I remember bouncing between pure excitement and complete panic. I had my dream job teaching 11th grade U.S. History. Yet, I still felt like I was standing at the edge of something enormous. I knew my content. I had survived (and even thrived!) during student teaching. There’s just something different about being the person at the front of your classroom with your roster, your routines, and your expectations.


These 10 tips for the first year teacher will help you feel less stressed as you find success as a high school teacher.

That first year was challenging in ways I didn’t expect. It also shaped me into the teacher I later became. If you’re a first year teacher, especially at the high school level, you deserve support, honesty, and real talk from someone who’s been exactly where you are. Let’s walk through ten things I wish someone had told me before I ever hung the first poster on my wall.


What Every First Year Teacher Should Know Before Day One

Being a first year teacher means juggling 100 things like classroom management, content prep and more.
Before we dive into the tips, I want to pause and reassure you of something every first year teacher needs to hear: you don’t have to know everything right now. Truly. High school is a fast-paced environment filled with big personalities, big emotions, and big expectations. When you’re starting out, it’s easy to feel like you’re already behind. But you’re not. You’re learning, growing, stepping into one of the most meaningful roles you’ll ever have.


Being a first year teacher means you’re juggling a hundred new things at once. We're talking grading policies, classroom management, content prep, school culture, and even remembering where the good stapler lives. While all of that can feel overwhelming, it’s also the start of something exciting. You’re about to build connections, impact teenagers’ lives, and create a classroom that reflects who you are as an educator.


This section of your career is supposed to feel messy and unfamiliar. That doesn’t mean you're unprepared. It means you’re becoming the teacher you’re meant to be. So take a breath. Give yourself grace. And know that the tips below are designed to help you feel supported, grounded, and ready for what comes next.


1. A First Year Teacher Should Start Small

When you walk into the classroom for the first time, it’s easy to want to change the world by third period. The truth every first year teacher needs to hear is that impact takes time. High schoolers don’t automatically trust you because you have a shiny new lanyard. Relationships are built slowly, one interaction at a time.


You’ll have days where you walk out feeling like you nailed it and days where you wonder if any teen in the building heard a single word you said. That’s normal. What matters is that you stay grounded in the small wins. The quiet student who suddenly participates, the class that laughs at your joke, the kid who asks for help because they trust you. Those moments are the foundation of everything else.


2. Remember That Survival Is a Strategy

One of my best tips for the first year teacher is to get advice for teaching teenagers from veteran teachers or online support groups.
Just because the school hired you, it does not mean they expect you to out-teach the veteran teachers on day one. You are at the beginning of a very steep learning curve. Take one day at a time. Yesterday is in the past, and let it go. Try to plan your lessons a week or so ahead of time, but know that it is okay to be planning today for tomorrow.


Teaching at any level is hard, but in high school, the emotional and psychological strain can sneak up on you fast. Teenagers negotiate everything from deadlines, rules, expectations, you name it. If you aren’t careful, you’ll spend half the day debating instead of teaching. That’s why clear, simple, consistent rules matter. Think about what worked (or didn’t!) during student teaching. Then ask a few veteran teachers in your building what they do. No friendly mentors on your campus yet? Try online communities like Teaching History with History Gal for insight and support.


Start with a short list of rules. Seriously, less is better. Enforce them with calm consistency. Don’t negotiate every request. Don’t soften boundaries because you’re worried about being liked. Teens may push back in the moment, but long-term, they respect teachers who are steady, fair, and genuine. You won’t win every kid over right away. Some of your students will challenge you every single class period. When you stay consistent and show them that your decisions can be trusted, you’ll make progress that matters.


3. Be Prepared But Not Perfect

be prepared with a folder of anytime activities to use in case of copier breaks or technology fails.
Preparation will save your sanity, especially when you teach high school. Perfection is not the goal. You can be prepared and still not know everything, and that’s okay. When I taught World History for the first time, I was learning major chunks of the content right alongside my students. I butchered pronunciations. I mixed up dates. I even had lessons crash so spectacularly that I wished the floor would swallow me whole. Every single messy moment taught me something valuable.


If you're a first year teacher teaching a subject outside your comfort zone, break the content into manageable chunks and learn with intention. Lean on YouTube channels, podcasts, teacher blogs, or colleagues to help fill the gaps. Build ten minutes of buffer time into your lessons. Trust me, you’ll use it. Whatever you do, create a folder of anytime activities for when the copier breaks, technology fails, or a lesson tanks. You’ll thank yourself later.


Being prepared doesn’t look like perfection. It looks like resilience, curiosity, and the willingness to adjust when things go sideways.


4. Be Flexible as a First Year Teacher

Another tip for first year teachers is to be flexible and and pivot quickly when lessons aren’t working for your students.
One of the biggest secrets to thriving as a first year teacher is learning to pivot quickly and without shame. You will have lessons that fall flat before they even get going. Maybe the directions confused everyone. Maybe the pacing was off. Maybe the activity simply wasn’t as brilliant as it seemed at midnight the night before. That’s normal.


When an activity stalls, don’t try to convince your students to love it. Move on. Switching gears gracefully saves time, protects your confidence, and keeps the energy in the room from sinking. On the flip side, when something is working, really working, let it grow. Extend the conversation. Give them extra time to collaborate. Ride the momentum. Flexibility isn’t losing control. It’s the ability to read the room and respond with confidence.


5. Avoid the Comparison Trap

Scrolling through Instagram, Pinterest, or teacher TikTok can feel like torture during your first year. Everyone seems to have the perfect classroom, flawless anchor charts, gorgeous bulletin boards, and systems that run like a dream. Those posts are carefully curated highlight reels. They do not always show the everyday chaos that every high school teacher experiences.


It's so easy as a first year teacher to constantly compare yourself and lose sight of what truly matters, which is the connection, growth, and authenticity you create with your students. Your students don’t care if your classroom is Pinterest-perfect. They care that you show up with humor, patience, fairness, and honesty. High schoolers are human lie detectors. They value real teachers, not polished performances.


6. Prioritize Building Relationships

prioritize building relationships with students early in the school year as a first year teacher.
Relationships matter more at the high school level than many people realize. Behind every eye roll and sarcastic comment is a teenager who wants to feel respected and seen. Learning their names quickly, asking about their interests, and acknowledging their efforts go a long way.


Make it a goal to build trust early. Greet your students at the door. Celebrate their wins. Notice who needs encouragement. When your students know you’re on their side, those tough management moments get easier, participation increases, and the class culture becomes something you’re proud of. For all teachers, relationships are foundational.


7. Establish Routines Early

Consistency is a gift to both you and your students. High schoolers crave structure, even if they pretend otherwise. Routines help your classroom run without constant reminders and reduce unnecessary stress.


Create predictable systems:


• How your students enter and start class
• How to submit work
• What to do when they’re finished
• How you handle phones
• How you manage group work
• What transitions look like


As a first year teacher, sticking to routines makes your days smoother and helps your students feel more secure. Once your procedures are established, you’ll find you have far more energy for the parts of teaching you love.


8. Learn to Protect Your Time as a First Year Teacher

Another key tip for first year teachers is to protect your time.
Your first year will be full of invitations. You'll be invited to join committees, sponsor clubs, help with events, coach teams, or volunteer for extra responsibilities. While some opportunities will genuinely excite you, many will drain your limited time and energy.


As a first year teacher, your main job is to build strong instruction and a strong classroom culture. Don’t be afraid to say no. Protecting your prep periods, your evenings, and your mental bandwidth isn’t selfish. It’s strategic and essential to your well-being. There will be many years to join extra activities at school. This year, invest in yourself.


9. Seek Out Support Systems

Your first year is not meant to be done alone. You need people. People who will answer your “Is this normal?” questions, who will talk you through tough days, who will share their lesson resources, and who will remind you that you’re doing better than you think.


Find those people. They might be in your hallway, in another department, or online in communities built for teachers. Mentorship doesn’t have to be formal. Sometimes the teacher down the hall who lets you vent between classes becomes your lifeline. As a first year teacher, it's so important to create a community for yourself to stay energized and grounded. We always say it takes a village to support our students. The same can be said for being an effective teacher. 


10. Self-Reflect Without Beating Yourself Up

My final tip for the first year teacher is to self-reflect without beating yourself up.
One of the most powerful habits you can build as a first year teacher is the ability to reflect without spiraling into self-criticism. Reflection is where the growth happens. It’s where you figure out which routines are working, which lessons need tweaking, and which parts of your day feel energizing or draining. Reflection should never turn into a running list of everything you think you did wrong. That’s not reflective practice. That’s self-destruction.


High school teaching moves fast. It’s easy to replay awkward moments or tough interactions on a loop after the bell rings. You don’t have to walk out every day feeling victorious. You just need to stay open to learning. A simple reflection routine, like jotting three things that worked and one thing to adjust, keeps your growth grounded and your confidence intact. Teaching is a profession built on constant evolution. Reflection is what helps you evolve with purpose instead of pressure. This is the habit that will shape you not just for your first year, but for every year that comes after.


Bonus Tip: Don't Reinvent the Wheel! 

We live in an information age, and that means you have a variety of resources at your fingertips. Don't feel like you need to create every lesson and every activity from scratch. You don't! Use the resources available to you that will save your time and energy for other tasks.

If you’re looking for resources that will make your life easier as a first year teacher, I’ve got you covered. In my TPT store, you’ll find a wide range of resources from engaging map activities and creative doodle notes to classroom games, biographies, bellringers, and review materials. These are all designed to save you time while keeping your students motivated and on task. I designed these resources with real classrooms in mind. They can be the extra support you need as you navigate the ups and downs of your first year.

You're Growing Into the Teacher You're Meant to Be

Being a first year teacher is equal parts exciting, overwhelming, exhausting, and inspiring. That’s exactly why it shapes you so deeply. You’re learning how to manage a classroom, connect with teenagers, teach content you love, and figure out who you are as an educator, all at the same time. It’s a lot, but it’s also the beginning of a career filled with impact and meaning. 


As you navigate this year, remember that you don’t have to be perfect to be effective. You just have to keep showing up, keep learning, and keep giving yourself the same grace you offer your students. Every challenge you face and every small win you celebrate is molding you into a stronger, more confident teacher. You’re doing hard work, and you’re doing it well. Trust the process, trust yourself, and know that you’ve absolutely got this!

Save for Later

If you want to revisit these ideas whenever the school year feels a little overwhelming, save this post for later. Pin it, bookmark it, or share it with a teacher friend who’s also navigating life as a first year teacher. Having quick access to encouragement and tips can make all the difference on the days when you need a reminder that you’re not alone and you’re absolutely capable of thriving in this new role.


Starting your journey as a first year teacher? I’m breaking down ten practical tips that every new teacher should know, from setting boundaries and establishing routines to building relationships with teens, staying flexible, managing tough moments, and creating backup plans that will save your sanity. You’ll find encouragement, real talk, and strategies that help you feel more confident and supported all year long. This post will help you navigate the challenges and celebrate the wins.
0

10 YouTube Channels That Rock!

By History Gal
I am slightly obsessed with finding quality YouTube videos for Middle and High School Social Studies classes. Let's face it, there are A LOT of bad YouTube videos out there and it can be painful to find a video that is entertaining, yet educational.

So here's my list of 10 YouTube Channels you should check out, bookmark, and maybe even subscribe.

5

Thriving on a Teacher's Salary #1


Woman at computer - Thriving on a Teacher Salary by History Gal


Living on a teacher's salary is hard. It became really difficult a few years ago when an unexpected visit to the emergency room resulted in a huge medical bill. All of a sudden, our monthly budget had to cover a monthly hospital payment. Money that was budgeted for things like buying groceries and paying for our daughter's dance class went towards paying down a huge medical bill. I decided there had to be a way for me to save on our monthly budget and I found several things that actually worked! I'm going to be sharing these tips over the next several weeks and I hope you will find them helpful wherever you are in your financial journey.

Tip #1: Stop Going to the Mall
Before kids, I used to go to the mall frequently just to see what was in the stores. I'd always buy something.  
My strategy is simple: If I don't go to the mall, I don't spend money.
The same goes for the outlet center that opened just miles from my house. It's been open 5 years, I've gone once. If I go to the mall or the outlets, I have a specific purpose and, more importantly, a specific budget.

Tip #2: Stick to a List
Have you ever ventured into Target for one item and ended up with a full cart and a $200 receipt? It's easy to do and it's happened to me many times.

So I make a list and do my best to stick to it.

Tip #3: Getting Paid to Shop Online, really!
I do most of my shopping online. It is easier than dragging my kids all around town. A few years ago, I discovered a site called Rakuten (formally Ebates). It actually pays you back for shopping online! Whenever you shop online, first visit Rakuten. Simply click on the store you want to shop and Rakuten redirects you to the store. Viola! You get a percentage back on your purchase. Percentages start at 1% and can go as high as 10%. Yep. You get money back for buying items you were already going to buy. There are no gimmicks or extra things to do (well, you do have to create an account!). Go to Rakuten first, shop, and every quarter they'll mail you a check or send it via PayPal. It's that easy. If you'd like to sign up, you can use my referral link or just go to Rakuten to sign up.

If you enjoyed this post, you should sign up for my monthly newsletter for more great ideas, tips, and exclusive freebies!

You May Also Like These Posts:

Musings of a History Galhttp://musingsofahistorygal.blogspot.com/2015/09/thriving-on-teachers-salary-1.html


2

The Power of Toons!

Today, I'm joining up with Teaching Trio for Technology Thursday!


I love comics and I especially like to incorporate comics and toons into my lessons.
Musings of a History GalMusings of a History Gal


Musings of a History Gal

3 Reasons You Should Use Cartoon Images in Your Class:
1. Toons make boring lessons, homework, worksheets, and even tests more fun.
2. They make high school students smile (believe me, high school students can be a tough audience!)
3. It shows students you have a sense of humor.


https://www.teacherspayteachers.com/Store/Ron-Leishman-Digital-Toonage
Don't know where to find great cartoon images? One of my favorite illustrators has some awesome resources for teachers! Since 1996, Ron Leishman has been putting up awesome toons daily on his site Toonaday. You'll have to sign up for a free account, but once you do, you can download his daily toon and access the last 30 days of toons. You are free to use these toons in your classroom and for personal use. If you'd like more of his toons and/or would like to use his toons for commercial use, Ron has a Teachers Pay Teachers Store: Ron Leishman Digital Toonage and a subscription site called ToonClipart.

What are you waiting for? Go add some humor to your classes!

 If you enjoyed this post, you should sign up for my monthly newsletter for more great ideas, tips, and exclusive freebies!
4

PowerPoint Hacks: Slide Sorter


Ever wish there was an easy way to move PowerPoint slides around? There is!
The Musings of  History Gal

The Musings of a History Gal
*These screen images are from PowerPoint 2010. If you have a different version, your screen will look different, but the steps should be similar. 

 If you enjoyed this post, you should sign up for my monthly newsletter for more great ideas, tips, and exclusive freebies!
0

My Favorite PowerPoint Hacks


During the last year, I've become a huge fan of PowerPoint. Maneuvering text and images is a breeze in PowerPoint. I use it for just about all of the documents and images I create on my computer. Since I've been spending so much time creating in PowerPoint, I've discovered lots of fantastic features!

Here are some of my favorite PowerPoint Hacks (click the link to learn more about each hack):
1. While I am creating a resource in PowerPoint, I create a template that I can use over and over again with Duplicating Slides.
2. While I am working on a new resource in PowerPoint, I can use a slide I created in a different PowerPoint by Reusing a Slide.
3. I use the Crop to Shape function to create shapes to use my presentations and resources.
4. I  Use the Shape Function to Make Borders
5. I use the Slide Sorter to reorganize my slides.
6. I use the Utilizing the 'Save As' Function to save my PowerPoint as PDFs and videos.


If you enjoyed this post, you should sign up for my monthly newsletter for more great ideas, tips, and exclusive freebies for teaching social studies!
4

5 Takeaways from Chaper 5: Differentiating in Response to Student Readiness

The Musings of a History Gal
I have to admit, while this chapter is full of great information and ideas, it is a little overwhelming to think of its complete implementation. As a teacher who taught on average 180 students a year on an A/B rotating block schedule, the sheer magnitude of differentiating for student readiness for 180 students makes my head pound.

There are several places in the chapter where I wrote comments in the margins like "how do teachers have time to do this?!" The idea of having to look through 180 preassessments a few days before a new unit and then use that data to create ways to differentiate the unit had me wondering if the authors had really even taught in a high school. However, the more I read, the more intrigued I became and here are 5 things I plan on doing.

The Musings of a History Gal5 Takeaways from This Chapter:


1. At the beginning of the year, assess students' readiness in reading, writing, and listening by having them (1) write out a set of directions, (2) read a passage and answer questions, (3) listen to me read a passage and then answer questions. This way I can identify students who struggle and will need help.

2. Create tiered reading assignments that cover the same essential content, but in a way that struggling students will understand and non-struggling students can be challenged.

3. Redefine preassessment. In my mind, a preassessment is a test. But, it doesn't have to be! It could be as simple as having students move to a certain corner of the room based on what they know about a topic we will be covering. For example:

The Musings of a History Gal

4. Create more checkpoints during a unit to make sure students are understanding what we are covering.

5. Remember that students' readiness is not static - it changes from topic to topic and skill to skill.

Did you miss my summary of Chapter 5? Read it here.

  If you enjoyed this post, you should sign up for my monthly newsletter for more great ideas, tips, and exclusive freebies!

2

Creating the Ultimate Sub Folder


If you’ve ever woken up sick at 5:00 a.m. or gotten that dreaded call from the school nurse saying your child isn’t feeling well, you know the panic that sets in when you realize you’re not prepared for a sub. Emergencies happen. We’ve all been there! That’s exactly why having a ready-to-go sub folder is such a lifesaver. I like to think of it as my classroom safety net. When everything is organized and ready, I can stay home and rest without worrying that my students or substitute will be left scrambling.

Creating the ultimate sub folder is easy when you have the right resources and know exactly what to include.

What to Include in Your Sub Folder

Include a class schedule, current roster and emergency lesson plans in your sub folder.
Your sub folder should be simple, organized, and easy to follow. I always start with the basics like updated class rolls, the current bell schedule, and any special notes about students who leave early or have accommodations. These small details make a big difference, especially for a substitute who may be new to your school or your class routine. I also make sure my sub folder includes both digital and printed copies of everything, just in case technology decides to act up.


Another must-have is a clear schedule layout. If your school runs on A/B days or rotating classes, try to make the schedule as visual and straightforward as possible. I’ve found that including a quick chart or even color-coding the classes can save a substitute a lot of confusion. The easier you make it for them to follow your day, the smoother everything will go in your absence.


I also always leave emergency lesson plans. They are simple, flexible activities that don’t depend on what we’re currently studying. These lessons usually cover topics that I know we have already covered. This way, if I’m unexpectedly out, I know the substitute can grab a plan that works with any unit. I also leave space for them to jot down how things went or if certain activities were particularly successful. It’s such a helpful way to stay in the loop when you return.

The Secret Ingredient - No Prep Sub Plans

These no prep sub plans include ten engaging activities that can fit into any U.S. or world history unit.
Let’s be honest. Creating meaningful sub plans is often the most stressful part of being out. That’s exactly why I designed my No Prep Sub Plans to take that pressure off your shoulders. These plans are designed specifically for history teachers. They include 10 engaging activities that can fit into any U.S. or World History unit. The best part? They come with clear teacher directions, print and digital options, and flexible timing guidelines so you can customize based on your schedule.


Each activity in the No Prep Sub Plans is self-contained. This means substitutes can easily pick up and teach without extra prep. Let's take a peek at some of the activities.


Whose Phone is This?

"Whose Phone Is This?" gets your students thinking creatively about historical figures through a modern lens.  Students will choose a historical figure that they have learned about and answer questions based on what that figure might have on their cell phone if they lived today.  It's a fun and engaging way to get students thinking about these figures as "real people" and not just a character in their textbook. 


Historical Front Page

The "Historical Front Page" is a 45–60 minute activity that has your students creating a front page for a historical event you have studied in class. Using both pictures and words, students must create the front page of a newspaper that is covering the historical event. Students must focus on accuracy, creativity, and connections to their notes. 


Infographic

The Infographic Activity allows your students to demonstrate understanding visually. After being introduced to how infographics share information using images, your students will create their own infographic. This activity is perfect for classes with diverse learners. 


Puzzles

There are even two puzzle options that are perfect for shorter class periods. Using the Crossword Puzzle and Word Find activities, students will reinforce vocabulary and key people from recent lessons. Students love creating the puzzles and then trading with a classmate to solve a puzzle. 


History Meets Social Media

With these activities, you can easily create a sub folder that is flexible, engaging and no prep.Your students who love social media will get a kick out of "History Book" and "Chatter"In these activities, they create mock profiles or posts for famous figures. These 30–45 minute tasks combine history and pop culture, making even the most reluctant learners excited to participate.

The Movie Plot

The Movie Plot task lets your students imagine pitching a historical film to a Hollywood producer. They have to think through characters, setting, and dialogue. It’s a 45–60 minute project that turns research into storytelling.
 

And. . . there are more activities included in this resource! Whether your substitute needs to fill one class period or an entire day, there’s enough variety to choose from while still keeping the work meaningful. What makes these sub plans stand out is the creative mix of activities. 


With all these options at your fingertips, you can easily build a sub folder that’s flexible, engaging, and completely no prep. Every activity is designed to stand alone, which means your sub doesn’t have to stress about keeping up with your pacing guide. You also don’t have to worry about reteaching everything when you return.


How to Keep Your Sub Folder Ready All Year

Revisit and refresh your sub folder often to make sure it is up-to-date and ready all year.
Creating your sub folder is just the beginning. The real key is keeping it up to date. I like to revisit mine at the start of each quarter. I replace outdated rosters, check my emergency contact list, and refresh my thank-you note for subs. I also keep a checklist in the front that reminds me to restock copies of any activities that were used. Having extra copies printed and ready to go has saved me more times than I can count!


Another helpful tip is to store your sub folder somewhere obvious. I keep mine in a clearly labeled binder right by my computer so it’s easy to find. I even let a trusted colleague know where it’s kept, just in case I’m ever out unexpectedly. If your school uses Google Drive, it’s worth uploading a digital backup there too. That way, everything, from rosters to sub plans, is just a click away.


Don’t forget the personal touch. I always include a thank-you note and, when possible, a small token of appreciation for my sub. Whether it’s a coffee gift card or a quick promise to cover their class in return, showing gratitude goes a long way. Substitutes often step into chaos, and a little kindness can make their day.


Grab Your Free Resource

If you’re ready to take the stress out of prepping for a sub day, I’ve got you covered! When you sign up, I will send you more tips and ideas for setting up your sub plan and one free activity. It's a ready-to-use activity that’s perfect to include in your sub folder. It’s an easy way to start building your collection of meaningful lessons that keep your students engaged and learning, even when you can’t be there. Sign up today and grab your free download to make your next sub day completely worry-free!


Time to Build Your Stress Free Sub Folder

Having a well-prepared sub folder isn’t just about organization. It’s about peace of mind. When everything your substitute needs is in one place, you can take that unexpected day off without feeling guilty or worried about what’s happening back at school. 

With my No Prep Sub Plans, you’ll know your students are still engaged in meaningful, standards-based work that ties directly to your content. So take a deep breath, grab a binder, and start creating your ultimate sub folder today. And. . . if you want ready-to-use activities for your sub folder, then make sure to grab my No Prep Sub Plans resource.  It includes all the activities from this post, and more!  Future you will be so glad you did!

Use this resource to quickly and easily create the ultimate sub folder.

Save for Later

Pin this post to your teacher board so you’ll have it handy the next time you’re setting up your sub folder or refreshing your emergency sub plans. You’ll thank yourself later when that unexpected sick day hits!

Need a stress-free way to prep for a sub day? You’re going to love this post about creating the ultimate sub folder that’s both organized and easy to grab in an emergency. You’ll get a closer look at my No Prep Sub Plans. This is a collection of engaging, ready-to-use history activities that keep learning on track even when you’re out. Whether you’re building your sub folder from scratch or just want to make it more effective, this post has everything you need.


4

Garbology: It is More Than Just Trash and How to Incorporate it into Your Social Studies Class

By History Gal

Imagine spending your days sifting through trash at a local landfill. What would you find? What could the trash tell you about the people that used that landfill?


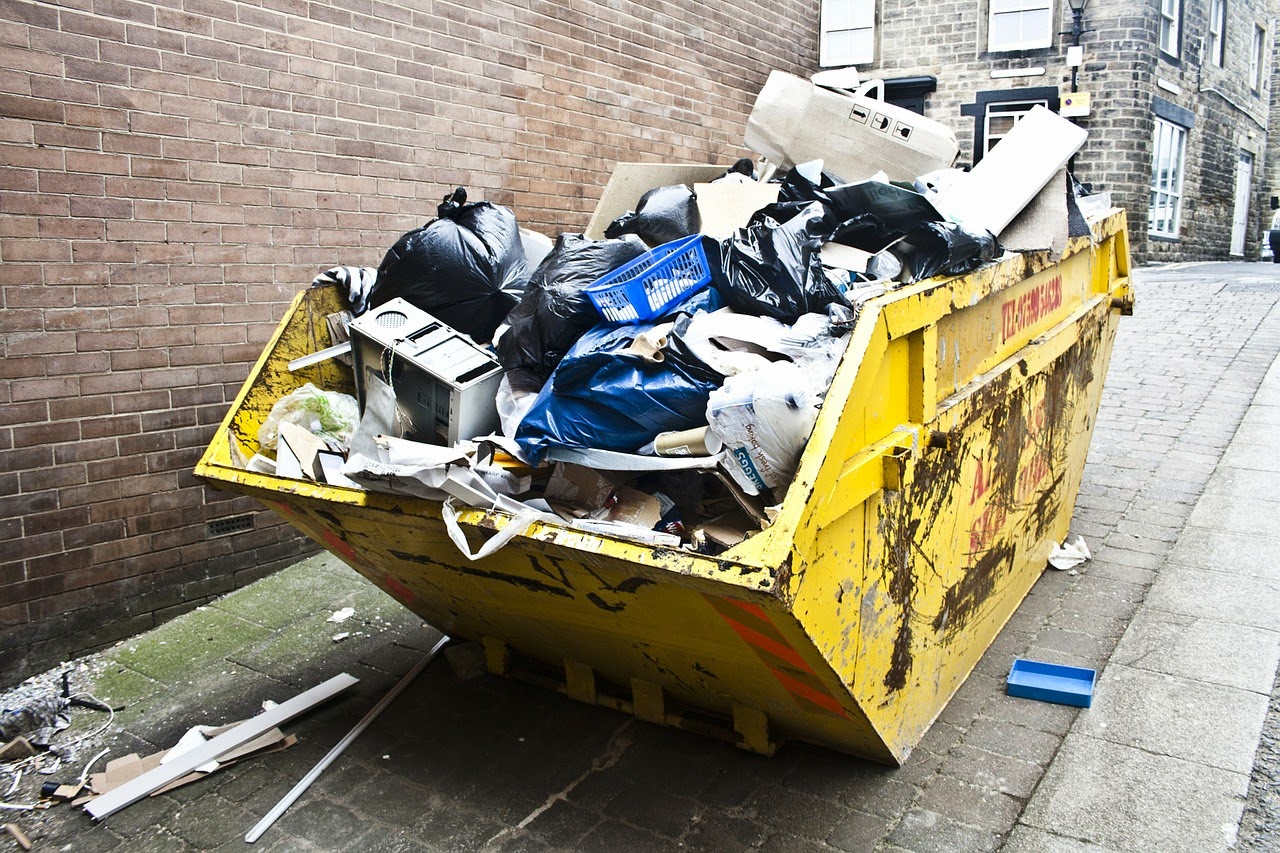
Strangely enough, this is no fictional job. It is the real job of a garbologist. A garbologist studies a culture by sifting through its trash. Garbologists are like archaeologists, but instead of examining the remains of ancient civilizations, they study the trash of modern cultures. By digging through the trash, garbologists learn what a culture eats and drinks, what they do for fun, what the culture considers trash, and much more.

William Rathje and the Study of Trash
     William Rathje is widely regarded as the father of garbology. In 1973 as a professor of Anthropology at the University of Arizona, Rathje and his students began the Garbage Project by sorting through the trash at a Tucson, Arizona landfill. Before his death in 2012, Rathje excavated over fifteen landfills, catalogued every piece of trash found, and wrote many books including Rubbish:the Archaeology of Garbage. He learned that trash gives garbologists a better understanding of modern culture than surveys and interviews.

Ask your students:
Why do you think trash gives a more accurate picture than surveys and interviews?
Do you always tell the truth when you take a survey? Why or why not?

Next, have students watch the short video Garbage Doesn’t Lie followed by a short video that shows garbology in action. Younger students may enjoy watching PBS’s Dragonfly episode about Garbology.


     Rathje’s Garbage Project in Tucson and the others that followed also proved that, contrary to popular belief, waste in landfills did not biodegrade. Since most students have little understanding of what actually happens to their trash once the garbage truck picks it up, have them watch or read How Stuff Works’ How Landfills Work. Then, students can listen to the first 4 minutes of This American Life’s episode about Garbage. Another interesting video you may want students to watch is a 21 minute video called The Story of Stuff which takes a look at product and consumption patterns.

      Since the start of Rathje’s Garbage Project in 1973, garbology has become more widely accepted in the science and anthropological fields. Critics that once mocked and ridiculed garbology were surprised at its findings and research applications. One of the greatest legacies of Rathje’s Garbage Project is its impact on waste management. Garbologists learned that waste in landfills including paper and food does not biodegrade. Because of these findings, cities are changing their waste management plans, instituting recycling programs, and educating their citizens about how to reduce the amount of waste going into area landfills.

A Garbology Project


     Rathje’s Garbage Project started with the idea of using modern trash to help students understand the archaeological process and it grew from there. Most middle or high school students will not have the opportunity to participate in a real archaeological dig.

However, assigning students a garbology project is a great way for students to gain a hands-on archaeological experience while learning what an anthropologist does. 

Do not worry; your students do not have to venture into a landfill to do garbology! 

They can do it in their school, place of work, place of worship, and even their own home. For an example of a student project, your students can check out what volunteers at the University of Washington do during the UW Garbology Project. Here, you can also view the analysis of a University of Washington’s dorm waste and view pictures.

     To begin the project, students, either individually, in partners, or in small groups, must choose a place (a culture) to examine. They must first gain permission from the culture before they begin sifting through their trash. Students should examine the culture’s trash several different times and keep a record of when they visited the dig site as well as everything found. The more times the groups visit their sites and examine its trash, the more accurate their results. Once students finish their digs, they should organize their findings into a spreadsheet or graph. Then, students should use the data to create conclusions about what the trash tells them about the culture. Lastly, students should present their findings to the class. Presentations can take a variety of forms. Students can create PowerPoint presentations, give oral reports, create a video, and much more.

     Students participating in a garbology project need to be familiar with the Code of Ethics of the American Anthropological Association. In particular, they should abide by Section 1: Do No Harm. Anthropologists have an important responsibility to the people with whom the researchers work and whose lives and cultures they study. Anthropologists must deliberately and purposefully consider all long-term impacts and unintentional consequences of their actions upon the culture they are studying. This means that students must guard the identities of names on any personal items that they might come across. Their project should not embarrass or cause anyone harm. Doing so directly violates the Code of Ethics.

      A culture’s trash is more than just waste. The trash of ancient and older civilizations uncovered by archaeologists helps us learn more about their cultures. In the same manner, the trash in modern landfills provides just as much insight into our modern cultures.


Download my free Garbology Project and get your students digging!

If you enjoyed this post, you should sign up for my monthly newsletter for more great ideas, tips, and exclusive freebies!


 My posts and images remain under Copyright &copy2015 History Gal. All rights reserved.
0
Back to Top