I love review games, but I HATE spending hours to create them. Out of necessity, I came up with a couple of review games that required very little prep time on my part and would work for all of the different subjects I was teaching. In fact, all you need for them is about 5 minutes to write down terms, vocab words, important people, important events from your current unit on some scrap paper, cut them out, and put them in a container so either you or student can draw from it.
My favorite is BINGO. Surprisingly, BINGO works great with all levels - even my "too cool" for just about anything upperclassmen. I also make some tweaks depending on my students' levels which makes the game work even better (I'll tell you about those in just a bit!).
Teacher Prep:
*24 terms from the unit (vocab, important people, important events, etc.)
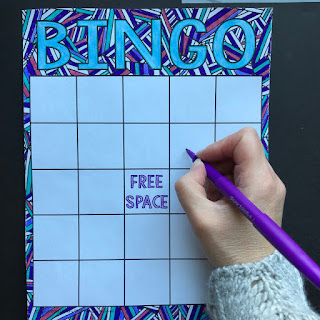
*Copies of a blank BINGO board for students to use (don't have one? No worries! You can download mine here)
Student Prep:
*Write down a term in each of the empty squares (teachers, you can be nice and write all the terms down on the board or just call them out one at a time)
Playing the Game:
1. Pull a term out of a hat or cup and announce the term to the class. Students then cover up the term with some scrap paper, bottle caps, small erasers, or color a corner of the square. To make the game more challenging, call out the term's definition (example: First President of the United States instead of calling out George Washington)
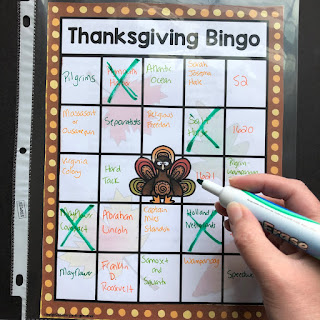
 TIP: Have students slide their filled out BINGO cards into plastic page protectors and then use dry erase markers to cross out the terms when they are called out.
2. Continue doing this until a student gets five terms in a vertical, horizontal, or diagonal line. When this happens, a student should call out "BINGO!" The space in the middle of the board is a free space and can be used to get BINGO.
3. Verify that the student correctly has BINGO. If desired, give them a piece of candy or a small reward.
4. Continue to play different rounds until the class or designated period is over.
Some Play Variations:
1. Throw a piece of candy at a student (warn them first!) and ask them to define, identify, or give a fact about the term you just called out. For example, if you pulled out the term "Sputnik," the student could answer "first satellite to orbit Earth."
2. Or, you can do the opposite call out "first satellite to orbit Earth" and the student would answer "Sputnik."
*Try to call on each student at least once. If you don't want to use candy, use a soft ball, a stuffed animal, a piece of balled up paper, etc.
Have a little more prep time on your hands?
You can create a BINGO template in PowerPoint that will make creating custom BINGO games for individual units a breeze! It is a little tedious to set it up, but you only have to do it once and you can re-use it an infinite number of time.
1. Open PowerPoint.
2. Go to DESIGN ---> Slide Size --> Custom Slide - Choose 'Portrait' and enter 8.5 for the Width and 11 for the Height.
3. Go to INSERT ---> Table - create a table that is 5 x 5.
4. Drag the borders of the table until it fills the desired area.
5. You can change the color of the table by going to DESIGN--->Layout - choose the colors you want
6. In the middle square, add the text 'Free Space' using whatever font you'd like (you can write directly in the box or add a text box)
6. If you haven't saved your template yet, now is a good time!
7. You will need multiple copies of this basic template (you'll need to make enough so that every student in your class will have one). You can make copies of a slide easily by going to HOME -->New Slide --->Duplicate Slide. Repeat this step until you have the desired number of slides
 8. SAVE!
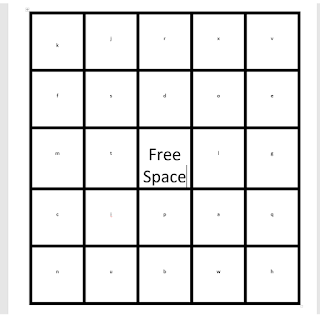
9. Now, comes another tedious step. There are 24 empty squares on each page. You need to label each square with letters from the alphabet 'a - x.' I find it best to do one letter at a time. I'll start with 'a' and on each slide, I will place an 'a' in a different square. Then 'b' and so on. It's important that each letter be randomly placed on each page/slide - this is what will let you get different versions for each student.
10. Remember to SAVE often! There's nothing worse than having to re-do step 9!
Viola! You have your template that can be used over and over again!
Using your template to make a BINGO game for your students:
1. Open your BINGO template.
2. Click SAVE AS and create a new document.
3. Add a text box to the top of the page/slide naming your game (World War II Bingo, Ancient Greece Bingo, etc.)
4. Go to HOME --> Replace -->Replace - pick a letter of the alphabet like 'a' and replace it with your BINGO term and Click to Replace. PowerPoint will automatically replace all of the 'a' with your term. Continue this step until you are done.
If you don't have time to create your own template and BINGO games, I have a bunch already made in my History Gal store. You can see them here!
Looking for more easy review games? Another one of my favorites is 1-2-3 Draw! and I have another blog post all about it here.


No comments
Thank you for leaving a comment! Comments must be approved before they are posted so there will be a delay in submitting a comment and seeing it on the site.